Showing posts with label Food. Show all posts

Wednesday, January 22, 2014

Fishy Fiesta @ An Affordable Price!

It was a frustrating day for me and when I'm frustrated, I eat, much more than usual.
I was at Downtown getting some stuff after school before heading home and I walked pass Fish & Co. They were having a hi tea buffet kind of thing where I can order anything on the Hi-Tea unlimited menu. It's all free flow, including the drinks.

I went for a try since student price was only $14.95++ and I can have all the grill fish and pasta I want. Fyi, I'm a fish lover. While thinking of what I should get the waiter told me that everything on this Hi-Tea menu is about half of the regular portion so I don't have to worry about being full right after 1 dish. So happy to hear that. It means I can try many many stuff! Wahahaha.

I had quite a bit of stuff starting off with the soup of the day: 
Fish chowder soup. I was too hungry to even snap a photo.

Follow by The best fish and chips.
The usual serving that they serve would be more than 1 slice of fish but for the Hi Tea unlimited, it's only 1 piece of fish with fries! If you're thinking that for the Hi Tea unlimited menu they are serving food not as good as what they always serve, you are wrong! 
Look at the chunky fish fillet that you will usually have at Fish & Co, irregardless of what time you dine with them.


Next, I had the shrimps & clams aglio olio.
The portion was just nice, not too much, not too little. At the same time making sure you get to enjoy enough clams & prawns with their super nicely roasted garlic. They clams & prawns were big and juicy, not the small and mini type alright. Usually when you have aglio olio you do not really sees the garlic or maybe you see a little of it yet the smell and taste is still fantastic. But at Fish & Co, their were very generous with their garlic and it was so well done that I actually don't mind so much garlic.


So how can a crazy fan of fish not have some grilled fish?!
I ordered a Grilled Salmon with corn + tangy peri peri sauce
I love salmon so when ordering I ask the waiter for recommendation of the sauce to go with my grilled salmon. She told me their signature sauce would be the lemon butter sauce but I already had it with my Fish & Chips so I might want to try the Tangy Peri Peri instead. She said it was a little sour a little sweet and I was like "ok la, i'll try it"


Surprisingly, the sauce goes well with my grilled salmon & I do love it. It's a little sweet & refreshing.  The salmon was also very nicely done. The outside was nicely grilled while the inside of the salmon was still soft and not overcooked.
Looks like it's a lot? 
I FINISHED IT, NOTHING LEFT!

I had a very satisfying meal at a very satisfying price. The menu state that for student is $14.95++ and if you're thinking that the +++ are gonna be quite a bomb. You're so so so wrong! I paid less than $20, to be exact, $17.60 only. If you don't believe, here's the receipt:


I know the first picture showing the menu isn't really clear so here's the clearer pictures of different section of the menu:


The pizzas are not available at Downtown East. I'm not sure if it's available at Sembawang Shopping Centre. You might want to check with the outlet before heading down if you're a pizza lover.

Here's something really cute on their menu. Usually when having buffet or something similar, they will always warn us about the food wastage and that we would be fine if we were to waste their food. At Fish & Co, they do it too, but in a much cuter way. After finish reading this, I realise I was a hungry shark.
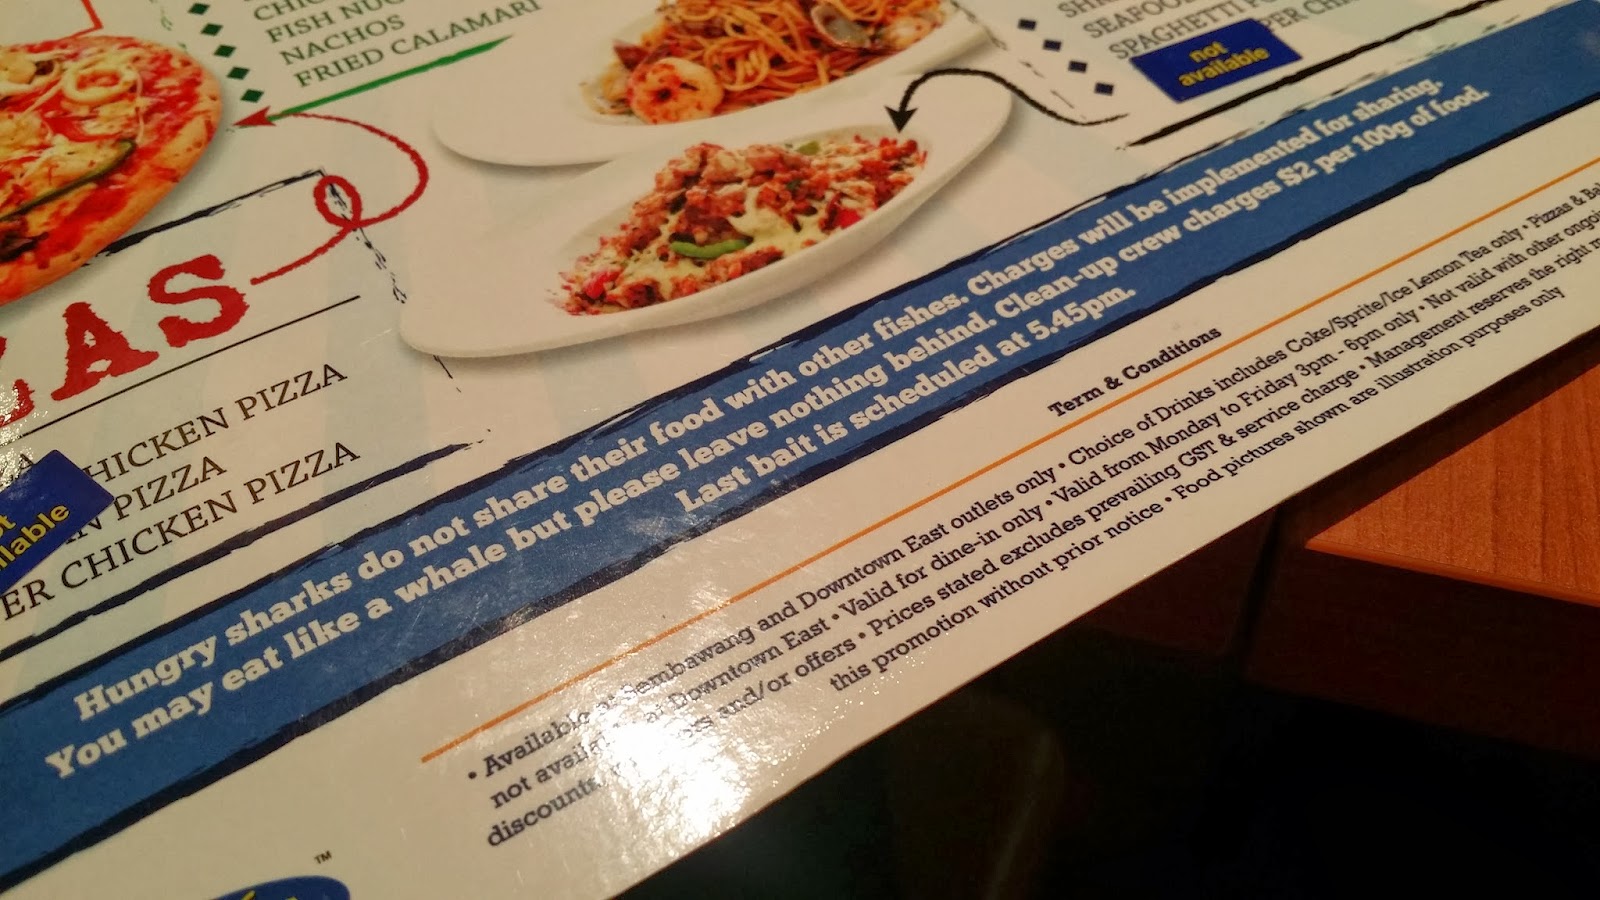

I know that Fish & Co has quite an amount of store in Singapore but only 2 stores are having this Hi Tea Unlimited, Downtown East & Sembawang Shopping Centre.
If you're a student looking for somewhere for a good meal with your friends for any occasion, be it birthday, result release day or any other reason, I think this is a good place to go. And if you go in a group of 4, you will get a free prawn fritter! 
Wanna try? Head down to either Downtown East or Sembawang Shopping Centre on Monday to Friday from 3pm - 6pm for you fishy fiesta at an affordable price ~
 photo sig.png

Wednesday, July 3, 2013

Strawberry Heart Jello Cheesecake

Thinking of something sweet to make your partner and hopefully it's not too difficult? Here is what you're looking for. A sweet looking dessert that not only look sweet but also taste sweet.

A few friends has been asking for the recipe ever since they saw me posting the photos on Instagram so here it is.
Sharing the recipe for my personal favourite: Strawberry Heart Jello Cheesecake 
No baking required! All you need is a whisk and a fridge. How hard can it be? :)

Here is how it looks like when it's ready to serve.
As you can see, it comes with 3 beautiful layer with a strawberry heart in it. How lovely is it.


Ingredients


For the crust:

400 grams sweet biscuits
200 grams melted butter


For the cheese layer:

500 grams cream cheese (placed in room temperature for 2 to 3 hours to soften) 
1.5 tablespoon gelatin powder 
1.5 cup boiling water 
2/3 cup sugar
1 teaspoon vanilla extract 
Strawberries 


For the jelly layer:

Any brand of strawberry flavour jelly you want


Method

Place sweet biscuits in food processor/blender and blend till it becomes fine crumbs.

Place both melted butter and fine crumbs together in a big bowl. 

Stir well till combine.

*Some may want to lay their pan with a piece of baking paper so the crumbs would not stick to the pan. I do not have this problem so I eliminated the use of baking paper*
Place the butter biscuit mixture into your pan.  Using a potato masher with a flat surface (or anything that has a flat surface), pack the mixture tightly into the pan.

Your crust is now done! Leave it in your fridge till we need it later.

Add 1.5 tablespoons of gelatine powder in a bowl. Add in 1.5 cups of boiling water to the gelatin powder. Stir well till all the gelatin dissolve. Set aside to cool.

Place 500g of cream cheese in large mixing bowl together with 2/3 cup of sugar.
Whisk till the mixture is light and fluffy.
*Be sure that your cheese is soft otherwise it will be very difficult to mix here*

Add in the cooled gelatine a little at a time, whisk well to combine

Add in 1 teaspoon of vanilla extract to the cream cheese mixture.

Your mixture should now be runny & smooth. 
If you see any lumps, no worries, just run your mixture through a sieve.

Remove pan from the fridge

Pour the cream cheese mixture on to the biscuit base and leave it to rest in room temperature for about 10-15mins

Meanwhile, we shall create those lovely strawberry hearts.
1. Wash your strawberries
2. Cut it into half
3. Cut out a V shape at the middle top of the strawberry. Make sure you slice of the part with the leaf
4. You now have your strawberry heart

Press each strawberry halfway into the cream cheese mixture.
Allow the strawberry to sink in, if not you'll see your strawberry floating on the jelly layer later.

Arrange the strawberry anyway you want it to look.
You can also create a word with the strawberry if you want to.

Cover pan with cling film wrap. 
Place pan in fridge.
Allow it to chill for at least 3 hours or overnight. 
If the cheese is not well chilled, it would spoil the whole look of the cheesecake when you add in the jelly layer later. Eg, Cheese floating in the midst of the jelly, not so nice ya.
*I usually leave it to chill overnight so I don't have to worry that it's not chilled enough"


3 hours or after a night...
Take your pan out from the fridge, remove the cling film wrap.
Your cream cheese should be set. No liquid, runny feeling. 
If you feel that it's still not set, place it back into the fridge for a few more hours till you feel the cream cheese is set.

Pick out your strawberry jelly powder to make the top layer.
*Different brand of jelly powder has different instruction, so follow the instruction given*

For the brand of jelly I pick, the instruction given was that I will first add boiling water, stir, follow by adding in cold water and stir till it is well combined.

Ensure that your jelly mixture has cooled before doing this, if not you will see small pieces of cheese floating in the jelly layer.
Gently & slowly, pour jelly mixture over your cream cheese layer.

You don't have to pour all the jelly mixture if you don't want to. 
Just ensure that the strawberries are well covered by your jelly mixture.

Cover with cling film wrap again.
Put it back into your fridge to chill for another 3 hours.

3 hours later...

To ensure that you cut it nicely, you will need a thin blade sharp knife.
1. Prepare a cup/bowl of hot water
2. Dip knife into hot water 
3. Wipe clean & cut your cheesecake
Repeat step 1 to 3 to get a clean cut.

Ready to serve!

Few other way I've done it.

Straight into a tupperware. No need to slice to serve. 
Jelly layer not added yet. 
Just eat from the tupperware, self consumption. 

Chopped strawberry instead of hearts so that every bite contains strawberry.
Strawberry lover might love this.

Girls, the key to a man's heart is through the stomach. You may wanna make this on a special occasion like your anniversary, Valentine Day or so.

Guys, if you make this for your lady, they will melt! 

For those who do not like strawberry, you can change it any other fruit of your liking, just ensure that the top layer jelly is of the same flavour too! 


Enjoy~